

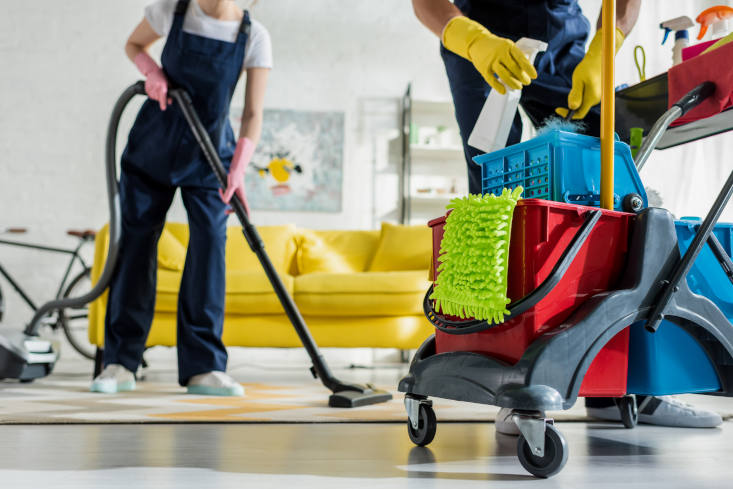
Daily sweeping and weekly dusting keep visible surface clutter at bay, but over time, homes accumulate invisible layers of grime. Airborne cooking grease settles into microscopic crevices, skin flakes collect inside soft furnishings, and static electricity pulls dust onto baseboards and vertical surfaces. A true deep clean goes beyond aesthetic organization, targeting hidden vectors of allergens and bacteria to restore the structural integrity of your living space and improve indoor air quality.
Executing a thorough deep clean can feel overwhelming without a systematic strategy. By approaching your home methodically, room by room and top to bottom, you eliminate wasted effort and ensure no hidden corner is overlooked. This comprehensive checklist provides the exact framework needed to transform your living environment into a genuinely pristine sanctuary.
Core Principles of Efficient Deep Cleaning
Before diving into specific rooms, establishing a foundational workflow maximizes your efficiency and saves your physical energy. Professional cleaning relies on gravity and sequence to prevent recontaminating areas you have already cleared.
-
Top-to-Bottom Execution: Always begin with the highest structural points, such as ceiling fans, light fixtures, and upper crown molding. Any dislodged dust will fall to the floor, where it will be captured during the final vacuuming and mopping stages.
-
Dry-to-Wet Sequencing: Remove loose dust, pet hair, and cobwebs with dry tools before applying liquid cleaners. Wiping a dusty surface with a damp rag creates a muddy slurry that smears across surfaces and settles into grain lines.
-
Declutter First: Clear all horizontal surfaces before opening your cleaning solutions. Moving items out of the target zone allows you to wipe down surfaces in continuous, uninhibited sweeps.
The Command Center: Kitchen Deep Cleaning
Due to the presence of heat, moisture, and organic matter, the kitchen requires the most intensive sanitization. Grease acts as a binder, trapping dust and forming a resilient film on vertical and horizontal surfaces alike.
Appliance Rejuvenation
Your major appliances work constantly and require internal attention to preserve mechanical efficiency and eliminate hidden odors.
-
The Refrigerator: Empty all contents, discarding expired items. Remove shelving and crisper drawers, washing them in warm, soapy water. Wipe down the interior walls with a mixture of baking soda and water to neutralize acidic odors without introducing harsh chemical perfumes near food storage zones. Vacuum the condenser coils at the bottom or rear of the unit to reduce energy consumption.
-
The Oven and Range: Apply a specialized degreaser or a thick baking soda paste to the interior surfaces, avoiding the heating elements. Allow it to sit for several hours to break down carbonized food residue. Scrub the wire racks with a stiff brush and wipe the interior completely clear.
-
The Dishwasher: Remove the bottom filter and rinse away trapped food debris under hot water. Place a cup of white vinegar on the top rack and run a hot cycle to dissolve hard water scale and soap scum buildup from the spray arms.
Cabinets and Countertops
-
Cabinet Fronts: Wipe down all cabinet faces, paying close attention to the areas surrounding the handles where skin oils transfer and trap grime. Use a wood-safe cleaner or a mild dish soap solution.
-
Backsplashes and Countertop Crevices: Clean grout lines using a firm brush and an oxygenated cleaning agent. Pull countertop appliances away from the wall to access the hidden tracks where crumbs and liquids collect.
The Sanitization Sanctuary: Bathroom Deep Cleaning
Bathrooms host high levels of humidity, creating a prime breeding ground for mold spores, mildew, and mineral deposits. Deep cleaning this zone requires targeted chemical reactions to dissolve stubborn scale.
Disinfecting the Wet Zone
-
Shower Walls and Tubs: Apply a scale-removing cleanser to tile surfaces, fiberglass stalls, or porcelain tubs. Allow the product to dwell for ten minutes to break down calcium carbonate and soap scum before scrubbing with a non-scratch pad. Clean out the grout channels thoroughly.
-
Showerheads: Mineral deposits frequently clog individual nozzles, reducing water pressure. Submerge the fixture in a bag filled with white vinegar, securing it with a rubber band, and let it soak overnight to dissolve the scale.
Fixtures and Vanities
-
Toilets: Apply an acidic toilet bowl cleaner deep under the rim, letting it run down the sides. Scrub the bowl vigorously. Wipe down the entire exterior of the porcelain fixture, including the base bolts, hinges, and flushing handle, using a dedicated disinfectant.
-
Sinks and Drains: Clean the overflow drain hole using a small brush, as this dark cavity often harbors hidden mold. Pour boiling water down the drain plumbing to flush away residual soap oils.
Restoring Comfort: Living Areas and Bedrooms
Living spaces and bedrooms are heavy traffic areas for dust mites, pet dander, and textile fibers. Deep cleaning here centers on extracting deep-seated particles from fabrics and vertical structures.
Window Frameworks and Walls
-
Blinds and Curtains: Vacuum heavy drapery using an upholstery attachment or launder lightweight curtains according to fabric care labels. Wipe down individual blind slats from center to edge using a microfiber cloth.
-
Window Tracks and Sills: Dead insects, dust, and condensation moisture settle into window tracks, often forming black residue. Spray the track with a general cleaner, let it loosen the dirt, and use cotton swabs to detail the narrow corners.
-
Walls and Baseboards: Dust walls using a clean, dry microfiber mop head. Wash the baseboards down with warm water and a splash of fabric softener, which helps repel future dust buildup through static reduction.
Furniture and Bedding Maintenance
-
Upholstered Furniture: Remove all cushions and vacuum deep into the structural crevices where debris accumulates. Use a fabric extraction machine or spot-treat stains with an appropriate enzyme cleaner.
-
Mattress Care: Strip all bedding, including protective covers. Vacuum the bare mattress surface thoroughly. Sprinkle a thin layer of baking soda across the fabric, leave it for an hour to absorb structural body oils, and vacuum it off. Rotate the mattress 180 degrees to promote even wear.
The Final Foundation: Floors and Ventilation
Once all elevated dirt has been dislodged and pushed downward, the final phase addresses the lowest boundaries of the home and the air delivery mechanisms.
Ventilation and Air Quality
-
HVAC Registers and Returns: Unscrew metal vent covers and wash them in warm, soapy water. Reach a vacuum wand deep into the exposed ductwork to extract loose dust clots before replacing the clean covers. Install fresh, high-efficiency particulate air filters into your furnace system.
Comprehensive Floor Extraction
-
Carpets and Rugs: Move all movable furniture pieces entirely out of the room. Vacuum the floor slowly in two perpendicular directions to lift compressed fibers. Utilize a hot-water extraction carpet cleaner to lift embedded soil from deep within the backing material.
-
Hardwood and Tile Flooring: Sweep the perimeter with a soft-bristled broom to capture edge dust. Mop the floor using a damp microfiber pad tailored to the specific flooring material, ensuring minimal water pooling on wood joints. Detail the edges along the baseboards by hand with a rag to capture missed residue.
Frequently Asked Questions
How frequently should a home undergo a rigorous deep clean compared to routine cleaning?
While standard maintenance should occur on a weekly cadence, a comprehensive deep clean is generally recommended twice a year, typically during the spring and autumn seasons. However, homes with multiple indoor pets, residents suffering from severe respiratory allergies, or large households may require a deep cleaning quarterly to properly manage dust mites, dander, and environmental tracking.
What is the safest approach to deep clean delicate electronics without causing water damage?
Never spray liquid solutions directly onto electronic screens, keyboards, or ventilation slots. Power down and unplug the device completely before cleaning. Use a dry microfiber cloth to remove surface static dust. For stuck-on grime, lightly dampen the microfiber cloth with a one-to-one mixture of distilled water and isopropyl alcohol, wipe the surface gently, and allow it to air dry fully before restoring power.
How do I clean wall surfaces without accidentally stripping away the paint or finish?
The safety of cleaning a wall depends heavily on the paint sheen. Matte and flat paints damage easily under moisture and friction; clean them using only dry microfiber dusters or highly wrung-out sponges with no additive chemicals. Glossy, semi-gloss, and satin finishes are more resilient and can tolerate mild dish soap solutions, but you should always perform a small spot test in an inconspicuous area behind a door before wiping down the entire wall.
What is the most effective method for cleaning heavily discolored grout lines in tile floors?
Avoid using harsh chlorine bleach, which can weaken the structural integrity of the grout matrix over time. Instead, create a thick paste using hydrogen peroxide and baking soda. Apply this mixture directly to the grout channels, let it sit for fifteen minutes to bubble out the trapped oils, and scrub vigorously with a nylon grout brush. Rinse the area thoroughly with clean water and dry it completely.
How can I thoroughly eliminate persistent musty odors coming directly from a front-loading washing machine?
Front-loading units frequently trap moisture behind the flexible rubber door gasket, leading to hidden mold growth. Pull back the folds of the rubber seal and wipe away accumulated sludge using a rag soaked in white vinegar. Next, clean the drain pump filter located at the bottom front of the appliance. Finally, run a cleaning cycle on the hottest setting using a dedicated washing machine descaler or two cups of bleach, leaving the door completely open afterward to air dry.
Is there a way to sanitize children’s plastic toys en masse during a deep clean?
The most efficient method for non-electronic, solid plastic toys is utilizing your dishwasher. Place smaller items like building blocks inside a mesh laundry bag on the top rack, and arrange larger items securely around them. Run a standard cycle using your normal detergent but turn off the heated dry function to prevent thin plastics from warping. Let the items air dry completely on a clean towel.
What should I do if my vacuum cleaner begins to emit a dusty odor while I am cleaning?
A dusty smell indicates that the vacuum cleaner itself is restricted or saturated, causing it to blow fine particulate matter back into your living space. Turn off the machine, empty the canister or replace the collection bag, and inspect the brush roll for wrapped hair. Most importantly, remove the internal foam and HEPA filters, rinse them under cold water until the water runs completely clear, and let them air dry for a full 24 hours before reassembling the unit.

Comments are closed.